
Agarose gel electrophoresis is a standard technique used in molecular biology for the separation, identification, and purification of nucleic acids. Its operational simplicity and broad applicability make proficiency in this method a fundamental prerequisite for biological laboratory research. The core of the method lies in the use of electric fields to drive DNA molecules through the pores of an agarose matrix, achieving effective separation based on molecular weight.
The following sections provide a detailed discussion of the experimental principles, standardized procedures, operational precautions, and troubleshooting strategies.
Experimental Principles
Electrophoresis separates compounds by exploiting differences in their migration efficiency within a stable electric field, driven by variations in molecular weight or net charge that determine the balance between electrical force and frictional resistance. In agarose gel electrophoresis, agarose gel serves as the supporting medium to carry the compounds during the process.
Agarose is a linear polymer composed of alternating D- and L-galactose residues linked by α(1→3) and β(1→4) glycosidic bonds. These agarose chains form helical fibers, which further aggregate into supercoiled structures with a radius of 20–30 nm. The resulting agarose gel matrix constitutes a three-dimensional network of sieve-like pores, with diameters ranging from 50 nm to slightly over 200 nm. This structure provides the necessary channels for molecular passage while exerting a defined level of resistance.
Factors Affecting DNA Migration Efficiency
1. Voltage and Current Across the Gel
According to Ohm’s law (V= IR), since the electrophoresis buffer is typically slightly alkaline (pH 7.8–8.0), DNA molecules within the gel carry a net negative charge and migrate toward the anode at a rate determined by the applied current. At low voltages, the migration rate of linear DNA fragments is directly proportional to the applied voltage. However, as the electric field strength increases, the migration rate of high-molecular-weight DNA fragments increases disproportionately. Consequently, the effective separation range of the agarose gel decreases as voltage increases. To achieve optimal resolution for DNA fragments larger than 2 kb, the applied voltage should not exceed 5–8 V/cm.
2. DNA Molecular Size
The migration rate of double-stranded DNA molecules through the gel matrix is inversely proportional to the common logarithm (log10) of the number of base pairs. Larger DNA molecules encounter greater frictional resistance and pass through the gel pores less efficiently than smaller molecules, resulting in a slower migration rate.
3. Agarose Concentration
Agarose gel is a porous colloid held together by hydrogen bonds and hydrophobic interactions. Under the influence of an electric current, linear DNA molecules migrate through a series of pores, the effective diameter of which depends on the concentration of agarose in the gel. A linear relationship exists between the logarithm of DNA electrophoretic mobility and the gel concentration.
4. DNA Conformation
Supercoiled circular (Form I), nicked circular (Form II), and linear (Form III) DNA migrate at different rates through agarose gels. In most cases, the most effective way to distinguish between these conformations is to run an untreated circular DNA sample alongside the same DNA sample linearized by digestion at a single restriction enzyme site.
5. Dyes in the Gel and Electrophoresis Buffer
The intercalation of dyes into double-stranded DNA reduces its net negative charge while increasing its rigidity and overall length. Consequently, the migration rate of linear DNA-dye complexes through the gel is reduced by approximately 15%.
6. Types of Agarose
There are two primary types of agarose commonly utilized: standard agarose and low-melting-point (LMP) agarose. A third type, currently under development, possesses a melting and gelling temperature intermediate between the two, combining their respective properties. Within each of these major categories, various specialized grades of agarose are available to meet specific separation requirements.
7. Electrophoresis Buffer
The migration of DNA is significantly influenced by the composition and ionic strength of the electrophoresis buffer. In the absence of ions (e.g., substituting water for the buffer in the gel or tank), electrical conductivity drops to negligible levels, causing DNA to migrate extremely slowly or not at all. Conversely, high ionic strength—such as the accidental use of a 10X buffer—increases conductivity significantly. This leads to the generation of excessive heat even at moderate voltages, which, in severe cases, can cause the gel to melt and the DNA to denature.

Experimental Procedures of Agarose Gel Electrophoresis
1. Select an appropriate plastic tray, place it into a clean casting mold, and ensure the setup is positioned on a level laboratory bench.
2. Prepare a sufficient volume of electrophoresis buffer (1×TAE或0.5×TBE) to both fill the electrophoresis tank and cast the gel.
Note: It is critical to use the same batch of buffer for both casting the gel and filling the tank. Even minor variations in ionic strength or pH can lead to abnormal gel performance, significantly affecting the migration of DNA fragments. When determining the size of unknown DNA fragments, all samples must be analyzed within the same gel cast with a uniform buffer.
3. Prepare an agarose solution of the appropriate concentration based on the size of the DNA fragments to be separated. Accurately weigh the agarose powder and add it to an Erlenmeyer flask or glass bottle containing a pre-measured volume of electrophoresis buffer.
-
The volume of the buffer should not exceed 50% of the flask or bottle capacity.
- Refer to the table for the agarose gel concentrations required to separate DNA of various sizes. Certain high-resolution agaroses can separate DNA fragments differing by only a few base pairs. Additionally, modified polysaccharides added to agarose can enhance resolution. Gels made with these modified mixtures at concentrations of 0.5%–2.0% (m/V) offer improved resolution, higher clarity, and greater mechanical strength.

Separation range of low electroosmosis agarose gels with different concentration standards.
Caution: Excessive heating in a microwave can cause the agarose solution to become superheated or boil over violently.
-
Heat the solution only for the minimum time required to completely dissolve all agarose particles. Undissolved agarose typically appears as small transparent or translucent specks suspended in the solution. Wearing protective gloves, carefully swirl the flask or bottle occasionally to ensure any undissolved particles adhering to the walls are incorporated into the solution.
-
Higher concentrations of agarose require longer heating times to dissolve.
-
After boiling, check if the solution volume has decreased due to evaporation; if necessary, restore the original volume with distilled water.
4. Allow the molten gel to cool slightly before adding a fluorescent dye (e.g., ethidium bromide to a final concentration of 0.5 μg/mL, or other dyes according to the manufacturer’s instructions). Gently swirl to ensure the dye is thoroughly mixed into the gel solution.
Caution: SYBR Gold should not be added directly to molten gel solutions.
Note: Fluorescent dyes may also be mixed directly with the samples or used for post-electrophoresis immersion staining.
5. While the agarose solution is cooling, select a suitable comb to create the loading wells. The bottom of the comb teeth should be positioned 0.5–1.0 mm above the surface of the tray to ensure that properly formed wells are created once the agarose is poured.
Note: Most gel trays feature sidewalls or external supports designed to hold the comb. If these are absent or improperly positioned, the comb teeth may sit too close to the tray bottom. This increases the risk of piercing the bottom of the wells when the comb is removed, which would allow the sample to leak between the gel and the tray.
6. Pour the warm agarose solution into the mold.
-
The optimal thickness for the gel is 3–5 mm. Ensure that there are no air bubbles trapped under or between the comb teeth. Bubbles in the molten gel can be easily removed by touching them with the corner of a lint-free wipe or by using a pipette tip.
-
When preparing low-concentration agarose gels (< 0.5%), first pour a supporting base of 1% agarose without loading wells. Allow this base to harden at room temperature on the tray or glass plate before pouring the low-concentration gel directly on top. This method significantly reduces the likelihood of the low-concentration gel breaking during subsequent procedures such as photography or Southern blotting. It is essential to ensure that both gel layers are prepared using the same batch of buffer and contain the same concentration of dye. Low-melting-point and sub-0.5% agarose gels can also be cooled to 4°C and run in a cold room to minimize the risk of breakage.
7. Allow the gel to solidify completely, which typically takes 30–45 minutes at room temperature. Add a small amount of electrophoresis buffer to the top of the gel, carefully remove the comb, and place the gel into the electrophoresis tank.
8. Add electrophoresis buffer to the tank until the gel is submerged by approximately 1 mm.
- Pre-electrophoresis of the agarose gel prior to sample loading is unnecessary.
9. Mix the DNA samples with the appropriate volume of loading buffer (common DNA loading buffers are supplied as 10× or 6× concentrates).
-
The maximum amount of DNA that can be loaded depends on the size and number of DNA fragments in the sample. If a 5 mm wide band contains more than 500 ng of DNA, the well is overloaded, which results in smearing, the “smiling effect” (upward curving of band edges), and blurred resolution. These issues become more pronounced as the DNA fragment length increases. For the analysis of single DNA species (such as λ phage or plasmid DNA), 100–500 ng per 5 mm well is appropriate. However, if the sample consists of many fragments of varying sizes (such as a restriction digest of mammalian genomic DNA), up to 20–30 μg can be loaded per well without a significant loss in resolution.
-
The maximum loading volume is determined by the capacity of the well. A standard well (0.5 cm × 0.5 cm × 0.15 cm) holds approximately 40 μL. Avoid overfilling the wells to prevent sample overflow and cross-contamination of adjacent lanes. To prevent overflow, consider casting a thicker gel to increase well capacity or concentrating the DNA via ethanol precipitation to reduce the loading volume.
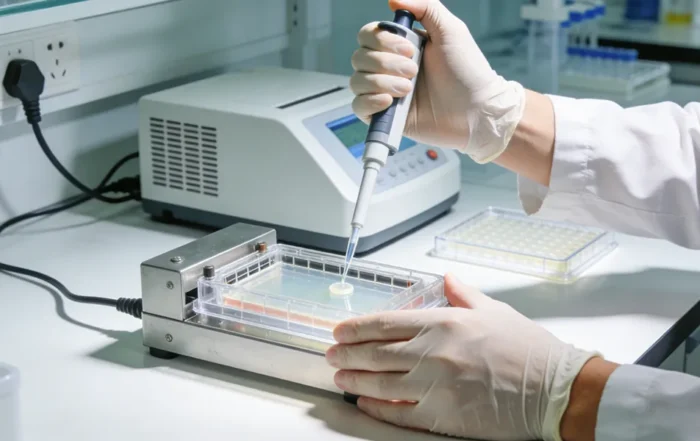
10. Slowly load the sample mixture into the submerged wells using disposable tips, an automatic micropipette, elongated Pasteur pipettes, or glass capillaries. DNA molecular weight markers (ladders) should be loaded into the wells to the immediate left and right of the sample lanes.
11. Close the electrophoresis tank lid and connect the electrical leads. DNA should migrate toward the anode (red lead). Apply a voltage of 1–8 V/cm, measured as the distance between the anode and the cathode. If the leads are connected correctly, bubbles will form at the electrodes due to electrolysis, and within a few minutes, the bromophenol blue dye will migrate from the wells into the gel matrix. Terminate the electrophoresis once the bromophenol blue and xylene cyanol FF have migrated to the desired distance.
-
Note: The presence of ethidium bromide allows the gel to be visualized under UV light at any stage during the run. The tray can be removed and the gel placed directly onto a transilluminator, or a handheld UV source can be used. In either case, the power supply must be briefly turned off during inspection.
-
Note: During electrophoresis, ethidium bromide migrates toward the cathode (opposite to the direction of DNA migration). Extended runs may significantly deplete the ethidium bromide concentration within the gel, making it difficult to detect small DNA fragments. If this occurs, the gel can be restained by immersing it in a 0.5 μg/mL ethidium bromide solution for 30–45 minutes.
12. Once the DNA samples or tracking dyes have migrated a sufficient distance, turn off the power, disconnect the leads, and open the tank lid. If the gel and buffer contain ethidium bromide, visualize the gel under UV light and capture an image using a CCD camera equipped with a UV interference filter.
13. Following electrophoresis, the gel may be used for DNA fragment recovery (gel extraction) or further processed for Southern blot analysis.

FAQ about Agarose Gel Electrophoresis
1. Can I use water instead of gel buffer or electrophoresis buffer?
Agarose gel preparation and electrophoresis are typically performed using either TAE (Tris-Acetate-EDTA) or TBE (Tris-Borate-EDTA) buffer. If water is substituted for the buffer during gel casting or electrophoresis, the gel will melt rapidly once the current is applied. Because TAE, TBE, and water are all clear, colorless solutions, it is essential to verify the container labels during preparation.
2. What would happen if I used the wrong concentration of agarose?
The standard agarose concentration for DNA gel electrophoresis is 1.0%. Higher concentrations provide superior resolution for smaller fragments; conversely, lower agarose concentrations yield better resolution and separation for high-molecular-weight bands. Utilizing an incorrect agarose concentration can make it difficult to determine the reliability of the DNA bands. Caution should be exercised when handling low-percentage agarose gels, as they tend to be softer and more prone to breakage.
3. What is the correct buffer solution for my agarose gel electrophoresis?
The selection of the buffer for DNA agarose gel electrophoresis depends primarily on the size of the DNA fragments and the intended downstream applications. The two most common buffers used are Tris-Acetate-EDTA (TAE) and Tris-Borate-EDTA (TBE). Because both buffers maintain a pH near neutrality, the DNA molecules carry a net negative charge and migrate toward the positive electrode (+) of the electrophoresis apparatus.
For small DNA fragments (<1000 bp), 1×TBE buffer is recommended, provided that there is no plan to recover the DNA from the gel. TBE solutions offer high ionic strength and superior buffering capacity. In contrast, TAE buffer, when combined with low electric field strength (1–2 V/cm), is optimal for separating large DNA fragments (12–15 kb). Compared to agarose gels in TBE, the interaction between TAE buffer and agarose results in lower electro-endosmosis and larger surface pore diameters. These properties, along with lower field strength, help reduce the smearing of large DNA molecules.
4. What does it mean if there is fluorescence in the sample well?
The red box in the image below illustrates a typical case of fluorescence remaining within the sample well. The potential causes for this phenomenon are as follows:

Primarily, this phenomenon involves the retention of DNA, often accompanied by residual protein; for specialized samples, other impurities may also induce fluorescence. Since proteins are rarely stained by Ethidium Bromide (EB), the presence of fluorescence inherently indicates the presence of nucleic acids. Extremely large genomic DNA (>50 kb) frequently fails to migrate out of the wells during standard agarose electrophoresis, which alone can result in fluorescence trapped within the loading well.
More frequently, fluorescence occurs when large DNA fragments bind to residual proteins, preventing them from entering the gel matrix. Enzymatic reaction products that have not been purified to remove enzymes are also highly prone to this issue, as almost all enzymes possess a strong binding affinity for nucleic acids. (For instance, PCR products of genomic DNA often exhibit fluorescence in the wells, the intensity of which is inversely proportional to the specificity of the reaction system.) In plant samples, this may additionally be caused by other residual impurities.
Based on empirical observation, fluorescence caused by protein residue tends to appear “dull” or muffled, whereas other impurities produce a fluorescence that is exceptionally bright, sharp, and thin. In the example provided above, the high intensity and sharpness of the signal suggest that the cause is likely an impurity other than protein.
5. What does the occurrence of degradation signify?
The phenomena of degradation are diverse and can be summarized as follows: the main band is no longer prominent, a smear extends toward the smaller fragment direction, and the fluorescence intensity diminishes in a relatively uniform manner.
If one or more of the following phenomena occur simultaneously, further investigation is required: the loading wells are exceptionally bright, smearing occurs in both directions (above and below) the position of the main band, or smearing originates directly from the loading well itself.
As shown in the image below, the area within the red box illustrates a typical example of degradation.

Given the lysing capacity of modern lysis buffers, degradation occurs primarily before complete homogenization; only a minimal fraction is caused by contaminated dissolution buffers.
Taking total RNA extraction as an example, the quality of total RNA ranks from highest to lowest as follows: suspended cells, adherent cells, and tissues. The evidence that degradation predominantly occurs before thorough homogenization lies in the fact that suspended cells are lysed the fastest, while tissues require the longest time to achieve complete lysis. Regarding fresh versus cryopreserved samples, rigorous cryopreservation and homogenization techniques can indeed ensure nucleic acid quality. However, many laboratories lack strict storage infrastructure, and experimental handling is not always flawless, resulting in nucleic acid degradation.
In fact, RNA extraction is influenced by numerous factors. Let us examine genomic DNA extraction as a reference.
Assuming digestion is performed using a solution containing Proteinase K, regardless of whether fresh or cryopreserved samples are used, the expected degradation—provided mixing is thorough—should be:
-
Cells: No degradation expected.
-
Crushed tissue: No degradation expected.
-
Large tissue chunks: Partial degradation.
If electrophoresis reveals degradation in fresh cells or crushed fresh tissue, this phenomenon is an artifact. Conversely, if degradation is observed in frozen cells or crushed frozen tissue, it is not an artifact; the sample has already degraded during storage. To put it more extremely, even if the Proteinase K is inactivated, the lysing capacity of the digestion reagents is sufficient to ensure that the cellular genomic DNA is not degraded during the extraction process.
How, then, can nucleic acid degradation be minimized or eliminated?
The priority must be placed on the phase prior to complete homogenization. Furthermore, the time interval between the sample leaving its original environment (or low-temperature storage) and the completion of homogenization must be minimized—the faster, the better.
Conclusion
We hope this guide will help you better master the fundamental knowledge and practical skills required for agarose gel electrophoresis, ensuring accurate nucleic acid separation and reliable experimental results in molecular biology research.
Reliable experimental results rely not only on standardized procedures but also on high-quality consumables. At GenFollower, we are committed to supporting reliable laboratory workflows by providing cost-effective, high-quality laboratory consumables designed for routine analytical and research applications.
To ensure precision and minimize error in your electrophoresis experiments, we offer a range of specialized tools, including:
-
Universal Pipette Tips: Engineered for high compatibility and precise liquid handling.
-
Gel-loading Tips: Specifically designed with thin, flexible ends to facilitate easy and accurate sample loading into narrow gel wells, preventing well damage or sample overflow.
If you are interested in our products or would like to learn more about how our consumables can optimize your laboratory efficiency, please feel free to contact us. We look forward to being your trusted partner in scientific discovery.
Recent Posts
The Ultimate Guide to Agarose Gel Electrophoresis
Agarose gel electrophoresis is a standard technique used in molecular biology for the separation, identification, and purification of nucleic acids. Its operational simplicity and broad applicability make proficiency in this method a fundamental prerequisite for [...]

Weighing It Right: A Comprehensive Guide to Accurate Laboratory Weighing
Sample weighing is a critical component of analytical experiments, as inaccuracies can lead to the failure of the entire process. When weighing results are consistently inaccurate, it is essential to perform a thorough analysis [...]

Knowledge Sharing: 9 new technologies for sample preparation
Fast, automated sample preparation improves laboratory efficiency while ensuring data reproducibility by reducing human error and sample loss during transfer. These technologies also support green chemistry initiatives by minimizing solvent waste. While modern analytical [...]
