While often considered a simple consumable, the choice and application of PCR seal films are critical yet frequently underestimated aspects of successful PCR workflows. An inadequate seal can lead to devastating consequences: sample evaporation altering reaction concentrations, cross-contamination ruining precious samples, or optical interference compromising sensitive detection. Whether you’re performing standard PCR, qPCR, or digital PCR, achieving a reliable, contaminant-free seal is non-negotiable for data integrity.
This practical guide cuts through the confusion, offering clear, actionable advice based on industry experience. We’ll demystify the process of properly sealing your PCR plates, help you navigate the key decision of selecting caps V.S. adhesive films, clarify the crucial differences between transparent optical films and opaque foil seals, and finally, weigh the pros and cons of adhesive-based sealing versus heat sealing methods. Master these fundamentals, and you’ll ensure your PCR results are built on a solid foundation.
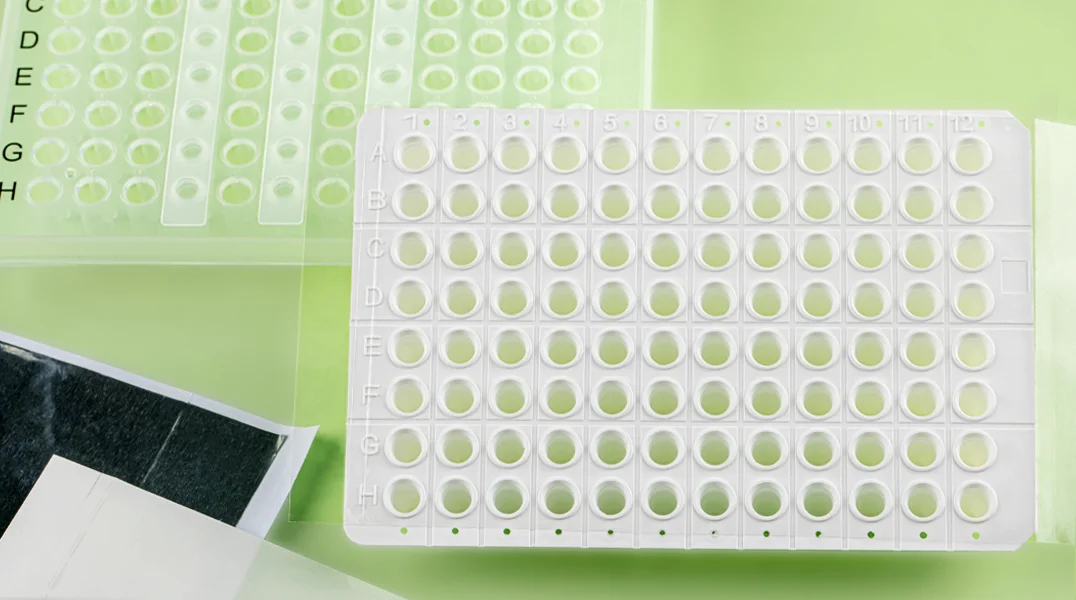
How to seal PCR plates correctly
Achieving a perfect seal on your PCR plate isn’t just a formality – it’s fundamental defense against sample loss and contamination. A compromised seal can lead to evaporation altering reaction stoichiometry, or worse, amplicon cross-contamination compromising entire experiments. Ensuring an airtight enclosure protects your valuable samples during thermal cycling and subsequent handling. Here’s a step-by-step guide to sealing with confidence:
Preparation stage: Find a clean environment
1. Set up your PCR reaction in the wells of the plate in a clean room or workspace to minimize airborne contamination.
2. Maintain meticulous cleanliness. Avoid splashing or droplets forming on the plate rim or between wells, as this can interfere with the seal and carry contaminants. Regularly decontaminate surfaces and equipment.
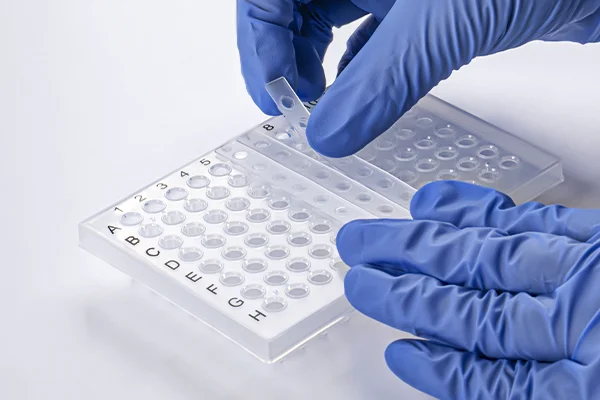
Sealing Method: Adhesive Films
Peel & Position: Carefully lift the corner of the adhesive seal and slowly peel away the protective backing layer, avoiding touching the adhesive surface. Position the film squarely over the plate.
Initial Contact: Gently lay the film across the entire plate surface, ensuring even coverage.
Secure the Bond: Use a dedicated roller applicator tool, a sterile glass bottle, or the flat edge of a clean lab tool. Apply firm, even pressure by rolling or rubbing methodically across the entire seal surface. Move systematically along rows and columns to ensure adhesive contact is complete around every single well rim. Pay extra attention to the outer wells and plate corners.

Sealing Method: Cap Strips
Stabilize the Plate: Secure the PCR plate firmly within a rack designed for capping or a stable microplate holder.
Alignment: Align the cap strip precisely over the target row(s) of wells. Ensure correct orientation if caps feature snap-hooks or specific locking mechanisms.
Apply Uniform Pressure:
Using a Capping Tool: Place the capping tool over the cap strip. Apply firm, vertical pressure evenly across the entire strip using the tool. This ensures simultaneous and uniform seating.
Manual Application (Alternative): If a tool isn’t available, place your thumb firmly over each cap and press down vertically and evenly until you feel or hear a distinct click or snap. Repeat meticulously for each cap, ensuring consistent engagement across the plate. Note: Manual application is more prone to inconsistency; a capping tool is highly recommended.
Visual Inspection
Adhesive Films: Examine the seal from multiple angles. Look for any bubbles, wrinkles, or areas where the adhesive appears lifted from the plate rim. Any gap indicates a potential leak. Pay close attention to the plate’s outer edges.
Cap Strips: Inspect every single cap. They should all sit perfectly flush and at the exact same height across the plate. Any cap tilted, raised, or not fully seated compromises the seal.
Action: Immediately address any problematic seals. For films, attempt to rub down the affected area firmly. If the issue persists, or for cap strips, the only safe recourse is often to replace the seal/cap and carefully transfer the contents of the affected well(s) to a new plate for resealing, ensuring minimal contamination risk. Never proceed with compromised seals.
Post-Sealing Protocol
Proceed or Store: With a verified seal, the plate is ready for immediate placement into the thermal cycler. If storage is necessary:
Place the sealed plate into a clean, dedicated plate storage box or sealed container.
Clearly label with experiment details and date.
Store in an appropriate controlled environment (e.g., -20°C freezer for long-term storage, 4°C refrigerator for short-term) to preserve reaction integrity. Protect plates from physical damage (e.g., stacking weight, impact).
selecting caps V.S. film seals
Choosing between PCR caps and film seals is more than a matter of convenience—it directly impacts experimental flexibility, contamination control, and data reliability. Understanding the core differences allows you to align sealing choices with specific workflow demands.
Key Advantages of PCR Caps
Dynamic Reusability & Targeted Access:
Caps (especially strip caps) excel in workflows requiring intermittent access to specific wells. They can be removed and resealed multiple times without compromising adjacent wells—ideal for reagent additions, sampling during time-course experiments, or partial plate usage. Unlike adhesive films, caps leave no sticky residue, eliminating the risk of sample carryover or well-edge contamination during recapping.
Compatibility & Thermal Conduction:
Opt for flat caps for thermal cyclers with heated lids (common in qPCR) to ensure uniform plate contact and heat transfer. Domed caps suit older cyclers without heated lids, accommodating liquid expansion. Always verify manufacturer compatibility—mismatched caps may cause poor seating, leading to evaporation or cross-contamination. Caps standardized across tubes and plates (e.g., 0.2 mL tubes and 96-well plates) simplify inventory management.
Automation-Friendly:
PCR capping tools enable rapid, uniform cap application across full plates, mitigating ergonomic strain in high-throughput labs. However, manual capping of individual strips remains error-prone; tilted or incomplete seals risk well integrity.
When to Choose Adhesive Film Seals
Universal Plate Compatibility:
Films adhere seamlessly to any PCR plate brand or format (96-well, 384-well, or custom layouts), eliminating vendor-lock concerns. This versatility is invaluable for multi-institutional collaborations or labs using diverse plate types.
Full-Plate Sealing Efficiency:
For experiments utilizing entire plates, a single film application is faster and more consistent than installing dozens of individual caps. Precision-cut films minimize edge wastage, and roller tools ensure uniform adhesion. Films also excel in long-term storage, especially heat-sealed variants, which reduce evaporation better than adhesive options.
Optical & Storage Optimization:
Optical films (transparent, low-autofluorescence) are essential for top-reading qPCR instruments. Foil films provide superior light-blocking and vapor barrier properties for light-sensitive reactions or ultra-low-temperature storage (≤−80°C). Films can also be pierced for robotic sampling—impossible with rigid caps.
Critical Limitations to Consider
Universal Plate Compatibility:
Films adhere seamlessly to any PCR plate brand or format (96-well, 384-well, or custom layouts), eliminating vendor-lock concerns. This versatility is invaluable for multi-institutional collaborations or labs using diverse plate types.
Full-Plate Sealing Efficiency:
For experiments utilizing entire plates, a single film application is faster and more consistent than installing dozens of individual caps. Precision-cut films minimize edge wastage, and roller tools ensure uniform adhesion. Films also excel in long-term storage, especially heat-sealed variants, which reduce evaporation better than adhesive options.
Optical & Storage Optimization:
Optical films (transparent, low-autofluorescence) are essential for top-reading qPCR instruments. Foil films provide superior light-blocking and vapor barrier properties for light-sensitive reactions or ultra-low-temperature storage (≤−80°C). Films can also be pierced for robotic sampling—impossible with rigid caps.

PCR Caps vs. Films
In addition, you still need to pay attention to the following points.
Avoid Film Residue: Peel films slowly at a 180° angle (parallel to the plate) to minimize adhesive transfer.
Cap Seating Check: Post-application, inspect caps for uniform height; tilted caps indicate poor sealing.
Thermal Cyclers: Confirm cycler compatibility—some instruments require specific cap profiles for optimal lid pressure
Differences: optical films V.S. opaque foil seals
Selecting between optical films and foil seals transcends convenience—it directly influences detection accuracy, sample longevity, and workflow compatibility. This decision hinges on three core variables: detection method (qPCR vs. endpoint PCR), sample light sensitivity, and storage requirements.
Optical Films: Maximizing Detection Fidelity
Optical films (ultra-clear polymer seals) are engineered for real-time quantitative PCR (qPCR) and other fluorescence-based assays. Their design prioritizes:
High Optical Clarity: Not all transparent films qualify as “optical.” True optical seals exhibit >95% light transmittance across visible-to-near-infrared spectra (380–700 nm), minimizing signal distortion during fluorescence detection. Substitutes (e.g., generic clear films) scatter light, increasing background noise and compromising Ct-value accuracy.
Low Autofluorescence: Premium optical films use cyclo-olefin polymers or specialty polypropylene that resist autofluorescence, preventing false signal amplification during sensitive multiplex qPCR.
Thermal Stability: Withstand repeated thermal cycling (4–100°C) without warping or delaminating, ensuring evaporation losses remain <2% per cycle.
Contamination Control: ISO 18385-compliant films undergo ethylene oxide treatment to eliminate DNA/RNase contaminants—critical for forensic, clinical, or low-template PCR.
Foil Seals: Shielding Samples for Robustness
Aluminum foil seals excel in non-optical workflows demanding physical protection or ultra-low-temperature resilience:
Light Blocking: Opaque aluminum blocks 100% of ambient light, preventing photodegradation of light-sensitive reagents (e.g., SYBR Green I, CRISPR-Cas nucleases).
Cryogenic Integrity: Superior vapor barriers reduce evaporation by 5–10× compared to adhesive films during long-term storage (–80°C). Foil’s metal-polymer laminates resist brittleness, maintaining seals for >2 years.
Pierceability: Robotic-compatible needles or manual pipettes can access samples without breaking the seal—enabling multi-timepoint sampling (e.g., kinetic studies).
Chemical Inertness: Aluminum’s passivation layer prevents leaching of ions that could inhibit polymerase activity.

Optical films V.S. Opaque foil seals
Optical films V.S. Opaque foil seals: When to Choose Which
qPCR/Detection-Driven Workflows:
Optical film is non-negotiable. Verify “qPCR-optimized” labeling and instrument compatibility (e.g., top-reading vs. bottom-reading cyclers).
For multiplex assays requiring UV excitation (e.g., FAM/HEX dyes), select films with certified UV transparency (e.g., Thermo Fisher Optical Ultra-Clear™).
Storage/Light-Sensitive Applications:
Foil seals dominate. Pair with heat sealing (not adhesive) for vapor loss reduction in cryogenic archives.
Use foil with silicone-polymer backing for flexible pierceability without adhesive residue.
Hybrid Workflows (e.g., qPCR + biobanking):
Seal initially with optical film for qPCR, then replace with foil after detection for archiving.
About adhesive and heat sealing film
Once you have determined from the above information that film seals are best for your PCR workflow, the next step is to determine whether you should use adhesive or heat seals.
Your choice between adhesive and heat sealing hinges on three pillars: protocol duration, equipment access, and sample sensitivity. Here’s the advantages of the two:
Adhesive films deliver simplicity for flexible workflows. Apply them manually using roller tools for bubble-free seals—no instruments needed. They suit short-term PCR (≤24 hr), partial-plate access, or budget-limited labs. However, adhesive bonds degrade in extreme temperatures (>80°C or <-20°C), increasing evaporation by 5–10× vs. heat sealing. Removal also risks sticky residue, requiring ethanol decontamination.
Heat sealing excels in integrity-critical applications. Using a plate sealer (110–130°C; 0.2–0.4 MPa), it fuses films to plates at the molecular level. This near-zero evaporation seal is essential for long-term storage (e.g., -80°C biobanks) or light-sensitive reagents (e.g., CRISPR nucleases). Automation compatibility (e.g., 50 plates/hour) further benefits high-throughput labs. The trade-off is equipment cost (2K–10K) and parameter sensitivity; ±5% temperature/pressure fluctuations cause seal failure.
Practical Insight: When to Commit
Choose adhesive if:
Running rapid qPCR, accessing wells individually, or avoiding capital investment.
Choose heat sealing if:
Archiving samples >72 hours, handling light/oxygen-sensitive reagents, or operating automated workflows.
Hybrid Strategy:
For multi-phase projects, run PCR with adhesive films, then transfer samples to heat-sealed plates for storage.
Adhesive films prioritize operational agility; heat sealing guarantees sample preservation. Align your choice to experimental timelines and integrity demands—eliminating sealing failures before amplification begins.
Recent Posts
Syringe Filters: From Type Selection to Standard Usage
What Are Syringe Filters Used For Syringe filters are small, single-use devices whose primary job is to remove particulate matter from a sample before it is analyzed or processed. While they are most [...]

4 Common Laboratory Sterilization Methods
In biological/chemical laboratories, sterilization is a crucial and unavoidable topic. Ensuring every pipette tip, tube and plate in your lab is truly sterile isn’t just good practice—it’s the difference between reliable data and costly [...]

PCR Seal Films: The Practical Guide
While often considered a simple consumable, the choice and application of PCR seal films are critical yet frequently underestimated aspects of successful PCR workflows. An inadequate seal can lead to devastating consequences: sample evaporation [...]